 Update:
I've created a ready-to-buy version of the magstripe reader described below.
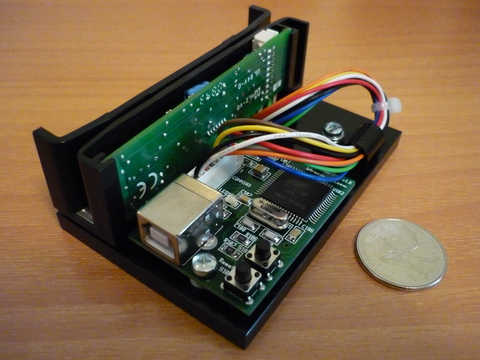
It is called Bit Reader USB and is pictured on the right. Unlike the version
described below, Bit Reader USB can read all 3 tracks of magnetic stripe cards
(as defined in ISO 7811) in one swipe. As with the Stripe Snoop version below,
Bit Reader USB reads data in raw form so that it can show data from a wider
variety of magnetic stripes, including many students cards, transit cards (such
as the NYC MetroCard and MBTA CharlieTicket), and hotel cards. You can use
Stripe Snoop with Bit Reader USB or you can use Bit Inspector, a graphical
application I designed specifically for it:
Update:
I've created a ready-to-buy version of the magstripe reader described below.
It is called Bit Reader USB and is pictured on the right. Unlike the version
described below, Bit Reader USB can read all 3 tracks of magnetic stripe cards
(as defined in ISO 7811) in one swipe. As with the Stripe Snoop version below,
Bit Reader USB reads data in raw form so that it can show data from a wider
variety of magnetic stripes, including many students cards, transit cards (such
as the NYC MetroCard and MBTA CharlieTicket), and hotel cards. You can use
Stripe Snoop with Bit Reader USB or you can use Bit Inspector, a graphical
application I designed specifically for it:
Bit Reader USB is available for US$120 plus shipping by sending me a message
through my contact form indicating
you'd like to purchase it. I will arrange a payment method with you once I
receive your request (PayPal is preferred). You can also send any questions
you have about Bit Reader USB to me using the same
contact form.
1. Overview
2. Parts List
3. Construction
4. Loading Firmware
5. Usage
6. Getting Help
7. Credits
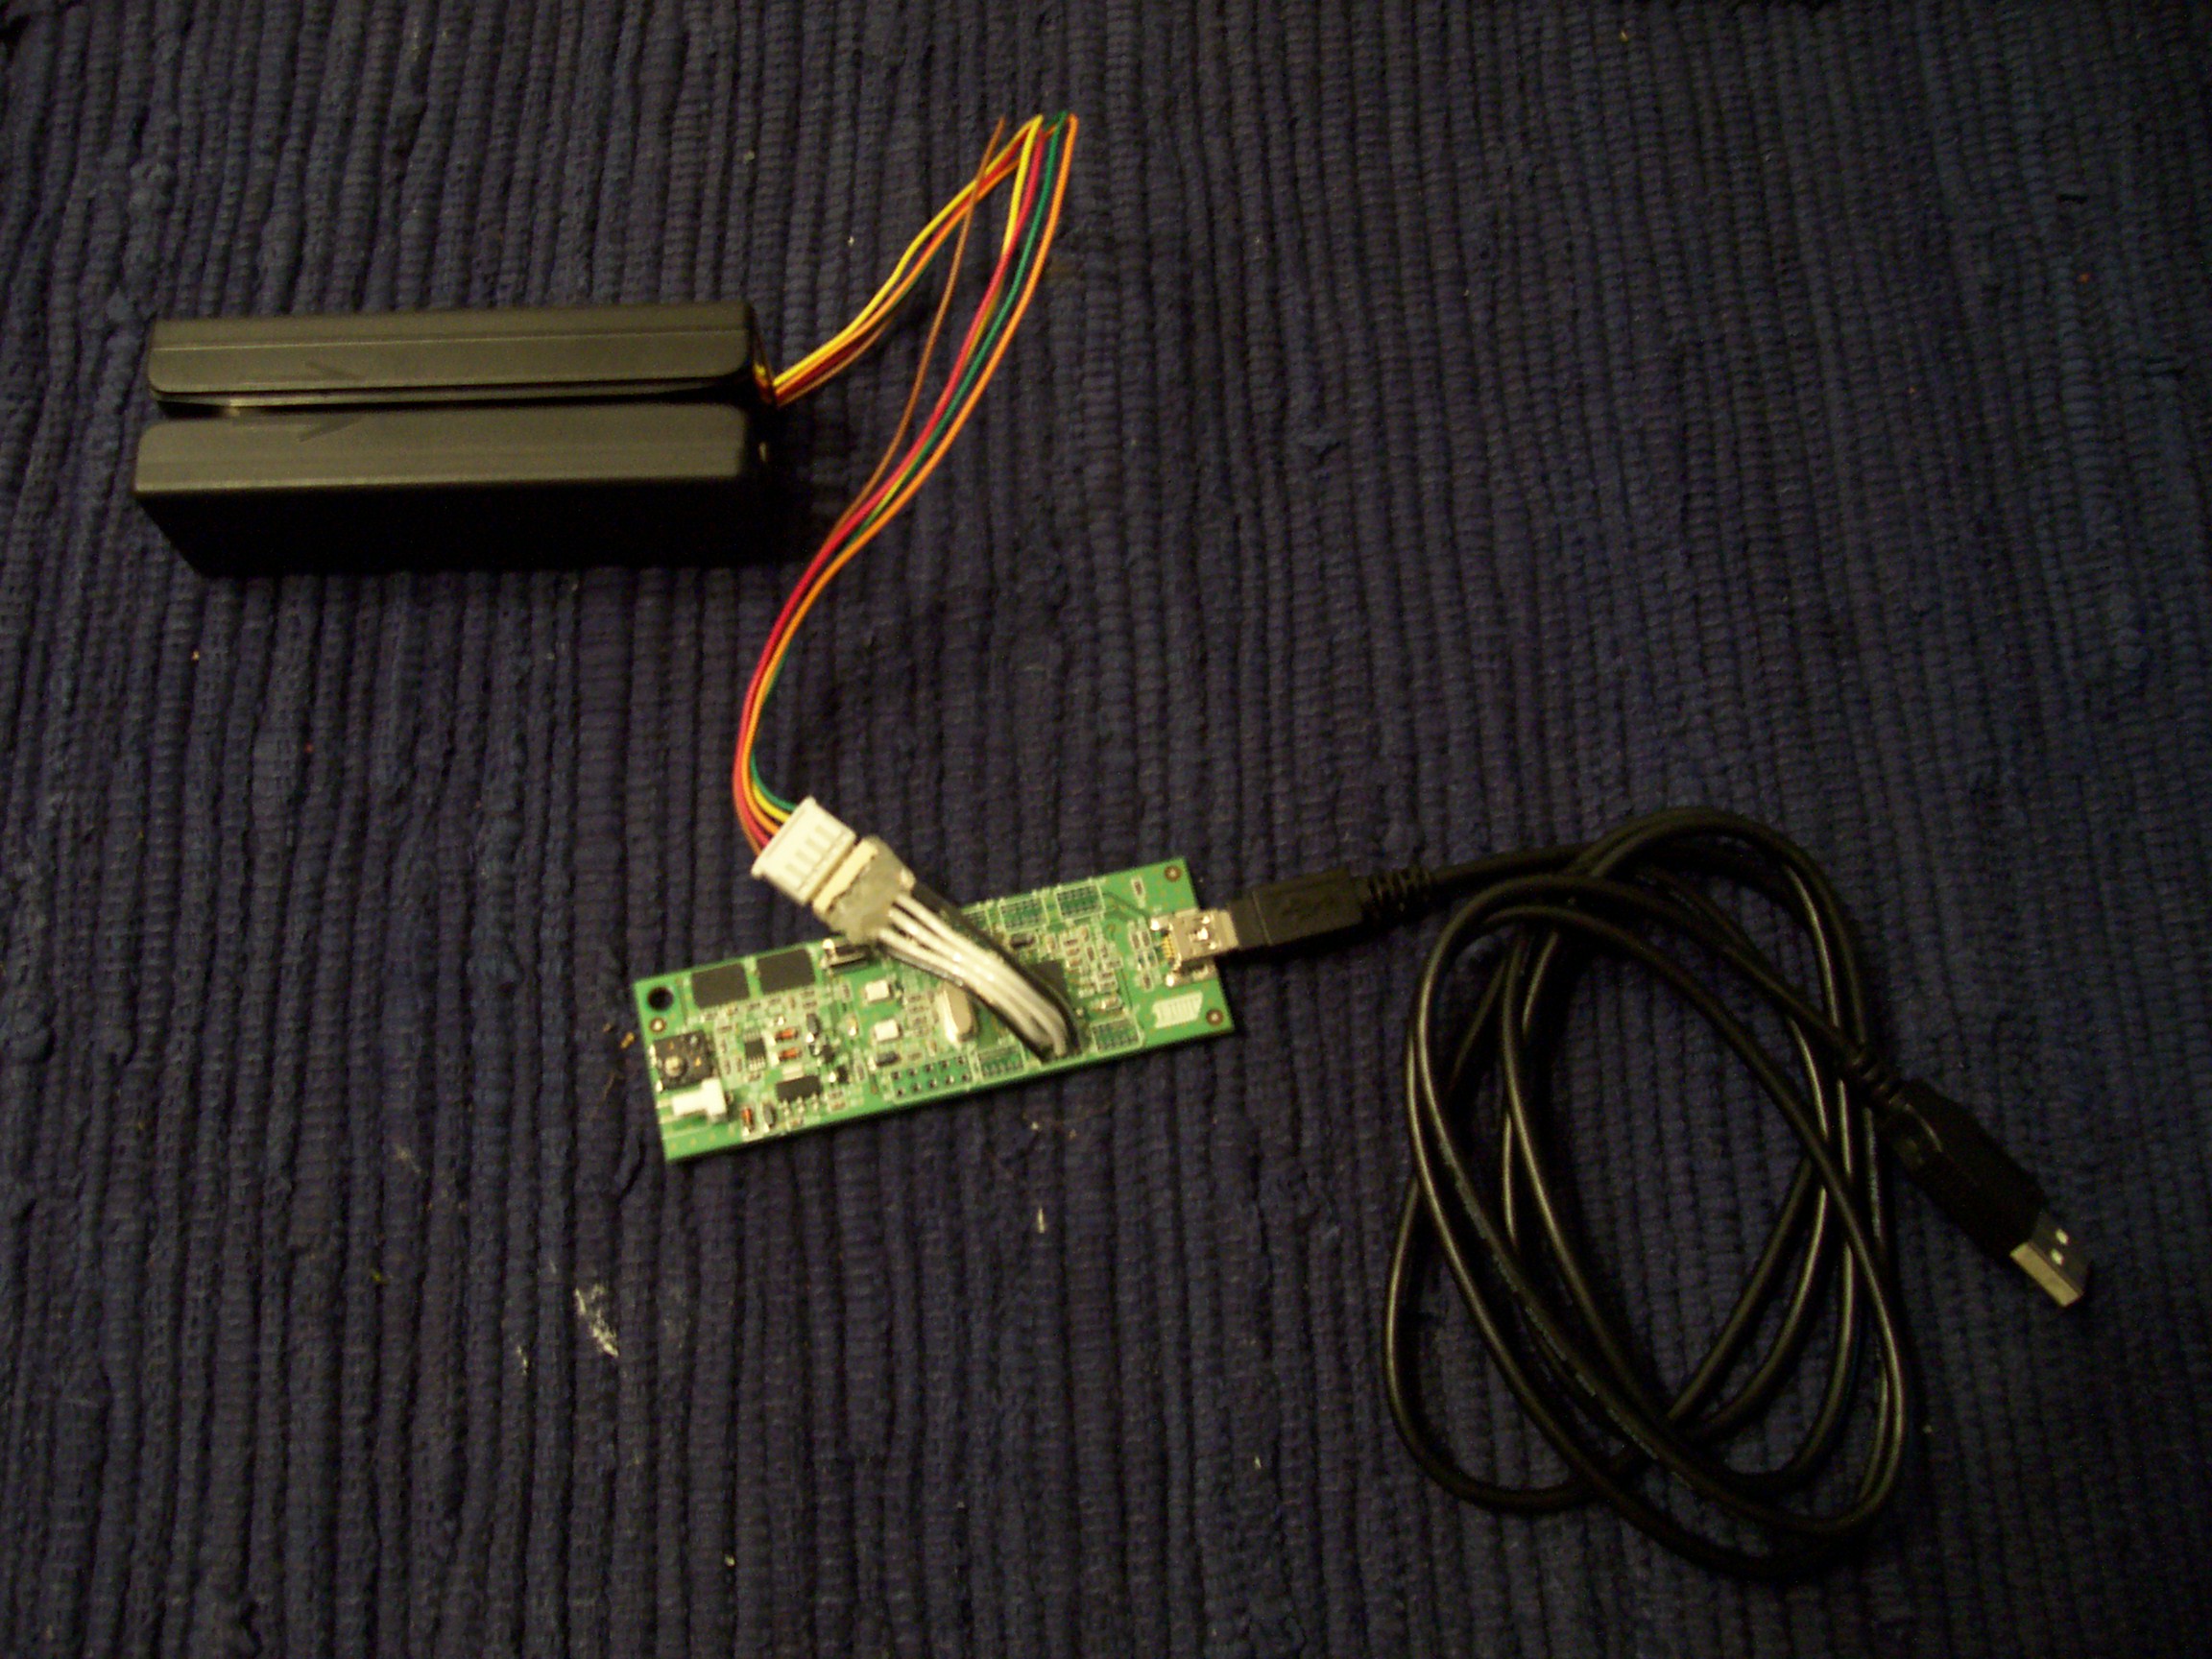
Many computers do not have gameports or even parallel ports, leaving USB as the primary option for input devices. These instructions will allow you to read data from a magnetic stripe reader on any computer that supports USB and the keyboard HID standard (which all modern operating systems support).
This adapter converts electrical signals from a TTL magnetic stripe reader into
1's and 0's that are "typed" on the USB keyboard device that the adapter
registers when it is plugged into a computer. This string of 1's and 0's can be
fed into Stripe Snoop using ss -i or saved to disk for later
analysis.
The finished product. (Click for a larger image)
2. Parts List
3. Construction
Use the data sheet for your TTL reader to determine which pins are 5V, ground,
data, clock, and card loaded. For the V3B, the data sheet is available here.
The pinouts are on page 3. If you don't have a V3B, check the manufacturer's
web site for a data sheet.
Connect the pins on the TTL reader to the pins on the AT90USBKey. The firmware
for the AT90USBKey is configured to use the following pin mapping. You can
ignore the AT90USB1287 name if you aren't planning to change the firmware to
use different pins.
The AT90USBKey
Hardware User Guide shows where port C is located on the AT90USBKey. This
is shown in Figure 2-1 on page 5. If you want to see the mappings from
AT90USBKey pins to AT90USB1287 names (ie. if you want to modify the firmware to
use different pins), see the schematic on page 19 of the user guide.
If you are using a V3B-4K, I suggest soldering wires from the AT90USBKey to a
5-pin header, such as a 53375-0590 or a 53426-0510. You can then
plug the V3B-4K directly into the header instead of having to snip the wires and
lose the 51102-0500
plug that the V3B-4K has.
If you are using a TTL reader that doesn't come with attached wires, then you
will have to solder the wires directly to the terminal on the TTL reader's PCB,
with the other end of wires soldered to the AT90USBKey according to the above
mapping table.
Now that the hardware is properly connected, you need to load firmware onto the
AT90USBKey that converts the TTL signals into key presses on the USB keyboard
that the device registers. First, download the firmware binary:
Magstripe.hex (8159 bytes),
MD5 checksum: cca702f9a423cab6fd732819b9c1a50b
(The binary was built from the November 13 2007, 18:37:27 version of the
Magstripe demo of the MyUSB project, which is available here:
MyUSB.zip (416,574 bytes), MD5
checksum: 89ed755b2faee4f11e5b17a85de9406d
The latest version of MyUSB is available from the MyUSB web site. MyUSB is
maintained by Dean Camera. The keyboard and magnetic stripe reader parts were
written by Denver Gingerich. The MyUSB project, including the Magstripe demo,
is licensed under the GNU General Public License version 3.)
Next, download a tool that supports loading firmware using the Device Firmware
Update (DFU) protocol. Here are the most popular tools for this:
Once you have the DFU tool installed, load the firmware onto the AT90USBKey
using the DFU tool's instructions. This usually involves holding the HWB button
on the AT90USBKey and then pressing the RST button. Doing this causes the
device to reboot in firmware update mode. This process is described in section
2.5.1 of the AT90USBKey
Hardware User Guide, which is on page 13.
After the firmware has been loaded, reset the device by pressing the RST button.
Now the AT90USBKey is ready for you to swipe a card.
When you swipe a card with the AT90USBKey and TTL reader connected to your
computer, the bitstream of the card will be typed as if a USB-connected keyboard
were typing the bitstream. You can save the data by opening up a text editor
and swiping cards. Or you can run Stripe Snoop with the
There are many Stripe Snoop users on the Stripe
Snoop development mailing list who would be happy to help with any issues
you encounter with these instructions. Don't hesitate to ask if you have a
question.
Dean Camera, the creator and maintainer of the MyUSB project, deserves a
big thank-you for the time he spent reviewing my code and integrating it into
his project. I couldn't have done this project without him.
This page is based on the Standard Game
port based Reader page, created by Acidus. The Stripe Snoop software referenced
in this document was created by Acidus.
TTL pin
pin on AT90USBKey board
AT90USB1287 name
data
port C, pin 10
PC0
clock
port C, pin 7
PC3
card loaded
port C, pin 6
PC4
ground
port C, pin 2
5V
port C, pin 1
4. Loading Firmware
Windows 98/Me/NT/2000/XP:
FLIP
3
GNU/Linux, Mac OS X:
Atmel USB DFU
Programmer
5. Usage-i flag
and swipe a card; Stripe Snoop will then interpret the information in the
bitstream. Under GNU/Linux or Mac OS X, you can run a command like the
following to swipe several cards without having to re-invoke Stripe Snoop every
time:
while [ true ]; do ./ss -i; done
6. Getting Help
Last Updated: